Send Filepicker Data with API Requests
To upload a file via API, follow these steps:
- Click the "+" icon next to Queries/JS and create a new blank API.
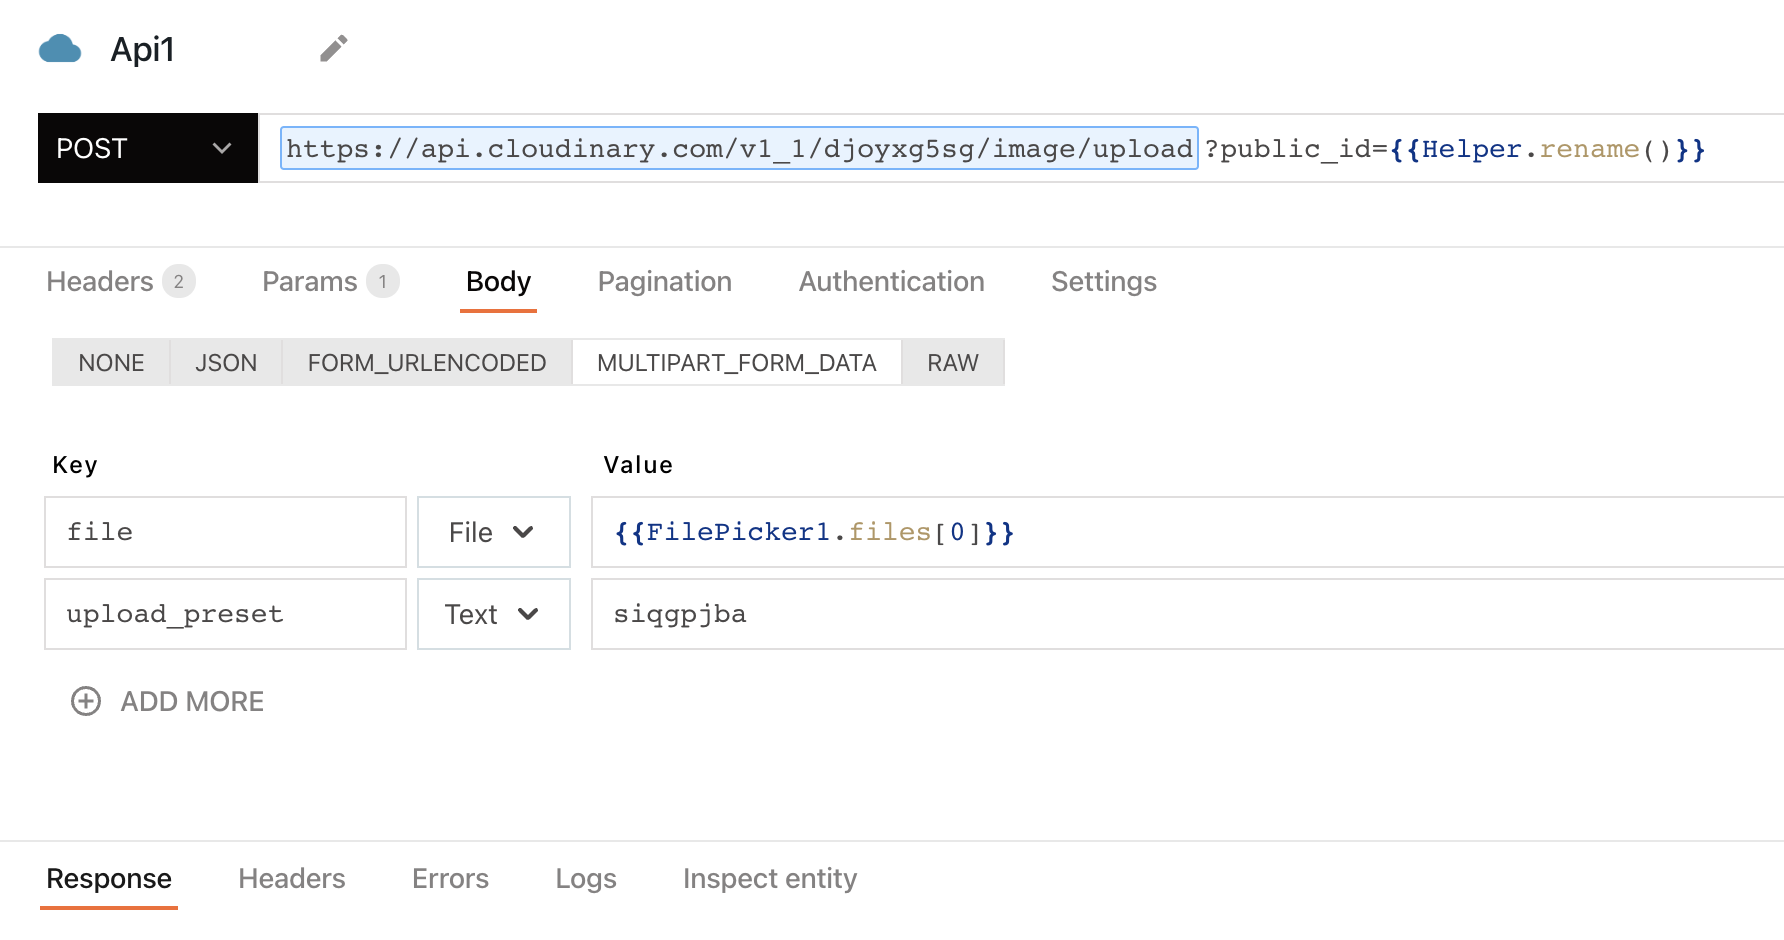
- As an example, lets consider using the Cloudinary API:
https://api.cloudinary.com/v1_1/{cloud_name}/image/uploadwhere{cloud_name}represents your Cloudinary username. You can retrieve yourcloud_nameandupload_presetfrom the Cloudinary dashboard. - Add the Cloudinary API URL and set the header in the API Datasource configuration.
- Configure the request body in a multipart structure, including the image file data and any additional metadata.

Be sure to select File in the datatype dropdown. If you would like to submit multiple files in the same request key, you can use {{ FilePicker1.files }} to include the entire contents of the Filepicker widget.
- Now, update the
onFilesSelectedproperty to RUN the API.
tip
If you intend to upload files of significant size, adjust the timeout settings in the API configuration.
To learn more, see how to use the Filepicker widget to upload or manage files on Cloudinary.
