AWS ECS on Fargate
This document guides you through installing Appsmith using AWS ECS on Fargate.
Prerequisites
Register with Amazon Web Services - You may skip this step if you already have an Amazon Web Services account.
Create a security group: - You can skip this step if you already have an existing security group with ports 80 and 443. Appsmith requires ports 80 and 443 for HTTP access. To edit the Inbound Rules and make ports 80 and 443 accessible from anywhere, see Add rules to a security group
Provision of an Application Load Balancer - You can skip this step if you already have an ALB, but ensure that the listeners for ports 80 and 443 are available.
Create an EFS filesystem:
- Navigate to AWS EFS on the console and hit the Create button.
- Set the parameters like VPC (should be the same as the ECS cluster) and storage class as suiting your requirement.
cautionEnsure that the EFS, ECS cluster, and Fargate instances are all in the same VPC.
- Click the EFS created and navigate to the Network tab to ensure the mount-target is made in the same availability zone as the ECS cluster.
- Create a new security group to allow inbound and outbound NFS traffic.
- Attach the security group to the EFS mount-target.
Create the ECS task role: To enable the
execcommand, follow the steps below:Go to the IAM console and select Roles.
Click Create Role.
Select trust entity:
- Select the Trusted entity type as AWS Service.
- Select Elastic Container Service Task as the use case, and hit next.
Add permission
- Add
SecretsManagerReadWrite. - Click Create Policy to open the policy editor, and choose JSON mode.
Custom IAM Policy{
"Version": "2012-10-17",
"Statement": [
{
"Effect": "Allow",
"Action": [
"ssmmessages:CreateControlChannel",
"ssmmessages:CreateDataChannel",
"ssmmessages:OpenControlChannel",
"ssmmessages:OpenDataChannel"
],
"Resource": "*"
}
]
}- Add
Name the role and review that the IAM task role has a trust policy that specifies the
ecs-tasks.amazonaws.comservice with thests:AssumeRolepermission as shown below:
Trust Policy{
"Version": "2008-10-17",
"Statement": [
{
"Sid": "",
"Effect": "Allow",
"Principal": {
"Service": "ecs-tasks.amazonaws.com"
},
"Action": "sts:AssumeRole"
}
]
}- Click Create.
Provision an external DB v5.0 instance - Obtain the MongoDB URI, which includes the user credentials for data access. Learn more about Custom MongoDB
Please don't run the built-in embedded MongoDB with the EFS, as it could cause the Appsmith instance to crash.
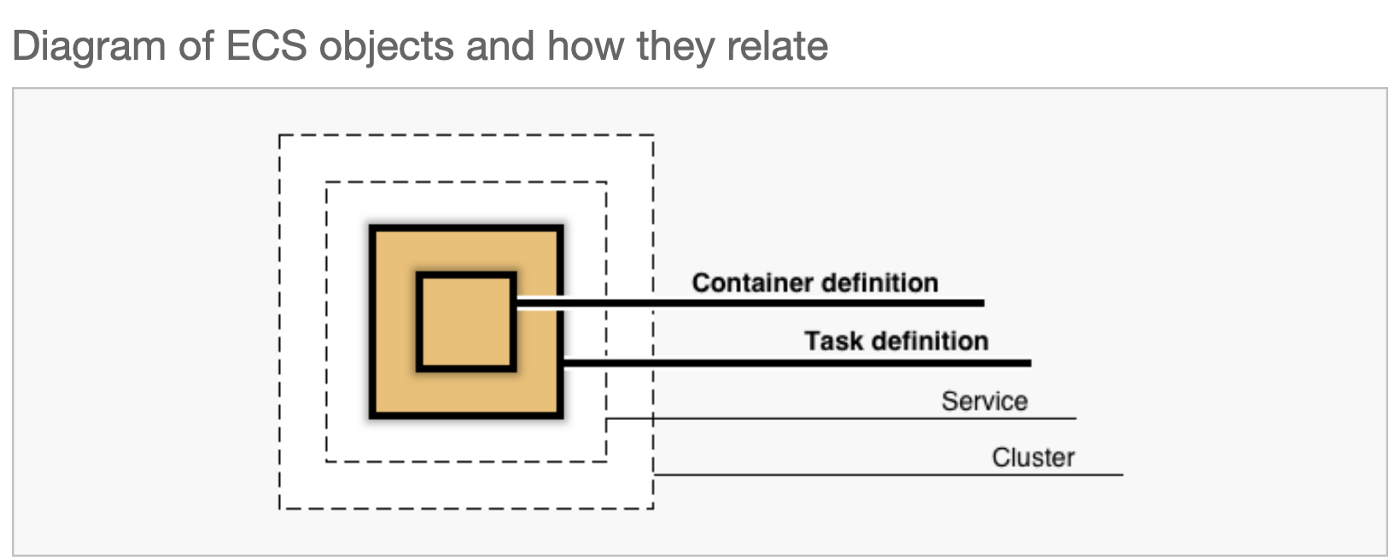
ECS overview
Deploy Appsmith
Switch to the old AWS console UI to follow the steps below.
Create an ECS cluster
Navigate to Amazon ECS, choose clusters on the sidebar, and select
Create Cluster.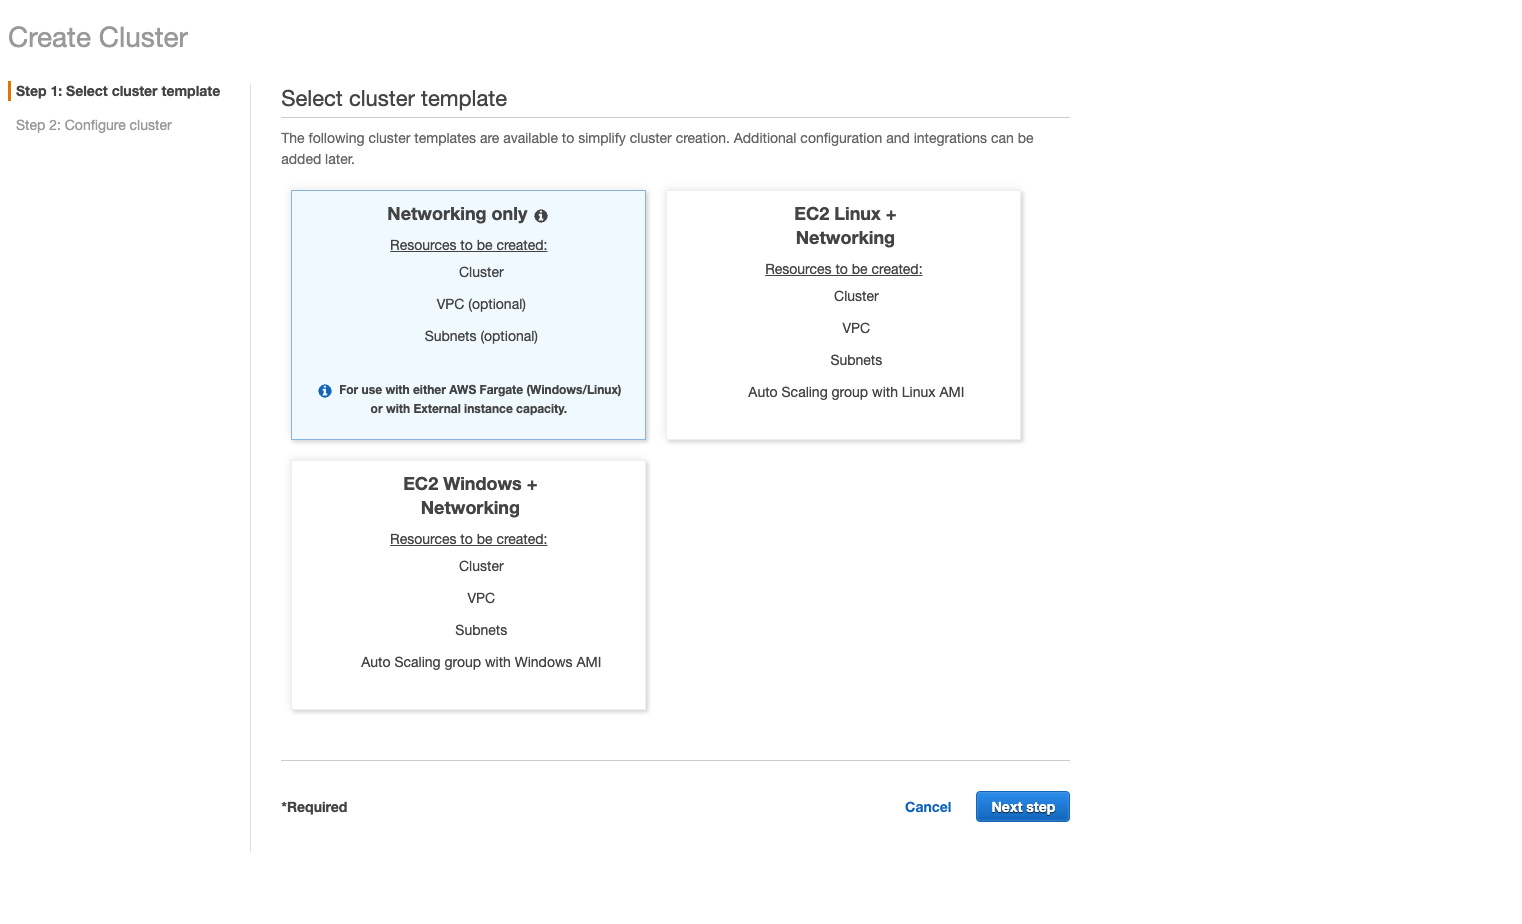
Choose Networking Only, and select the next step.
Enter your cluster name.
Create a VPC by defining the CIDR block and subnets. You can skip this step if you already have a VPC.
Enable CloudWatch Container Insights.
Hit the Create button.
Create task and container definitions
Once the cluster is created, you need to create a task that runs on the cluster formed in Step 1.
On the sidebar, choose Task Definitions and Create a new Task Definition.
Choose Fargate as the launch type, and proceed to the next step.
Enter the task definition name.
Set the task role to the one created in step 5 Create the ECS task role under Prerequisites
Select the default Network mode.
Set Linux as the Operating system family.
Set the Task Execution Role option to [Create new role].
Set the required task size for memory & CPU (Minimum requirement: 2vCPU and 4 GB Memory).
Go to the Volumes section and add a new volume. Enter the Name as
appsmith_stack, set the Volume type as EFS, and set the File System ID to the EFS filesystem created in the prerequisite step. Leave the remaining fields with the default values.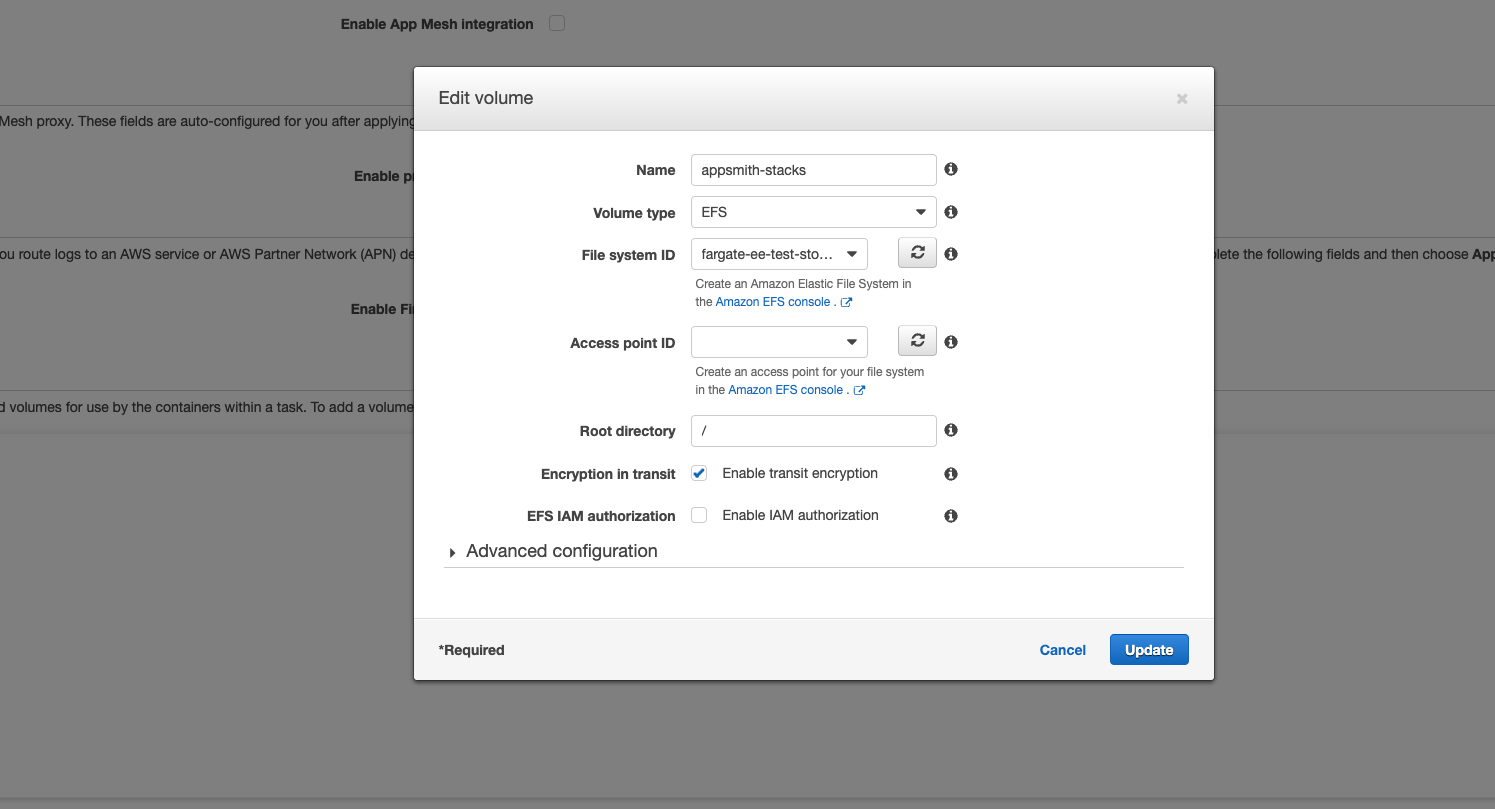
Configure the Appsmith container.
- Click the Add container button.
- Enter the container name, and set the Image to
appsmith/appsmith-ce. - Add port mappings for ports 80->80,443->443.
- Set the Mount points Source volume to
appsmith_stackand set the Container path to/appsmith-stacks.
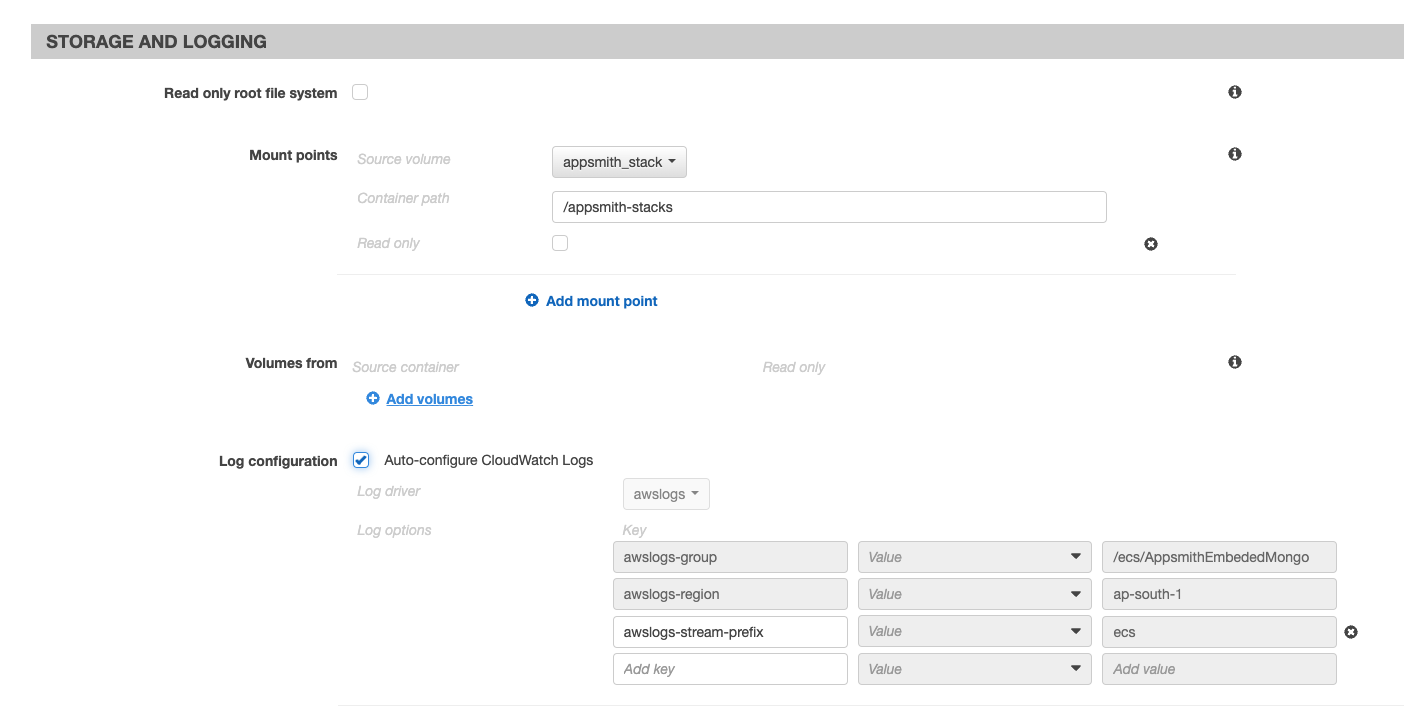
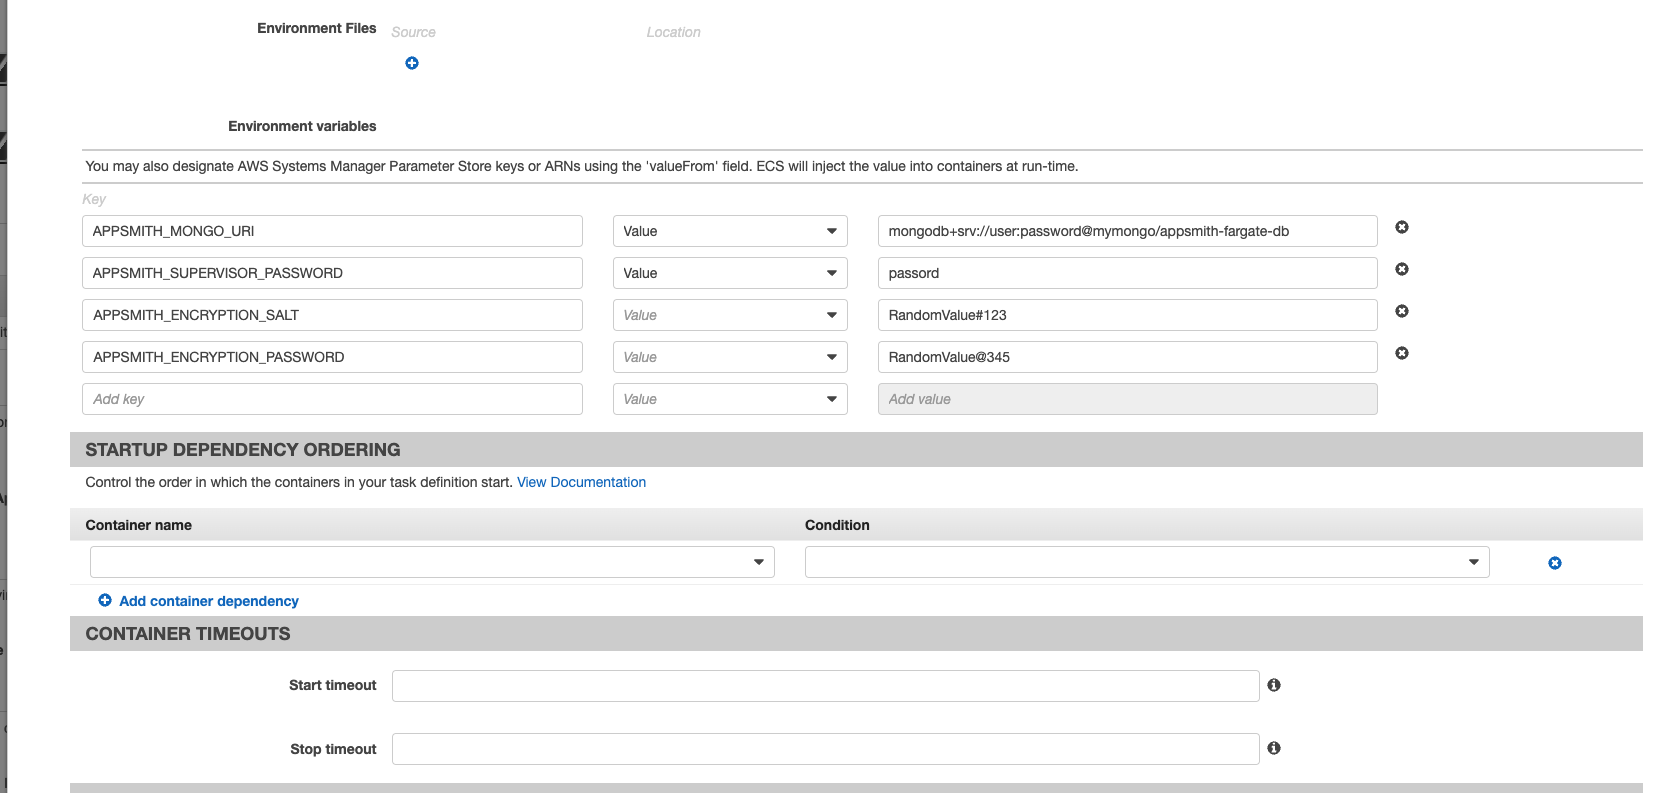
You can configure the Environment Values for the Appsmith in the Environment Section. For sensitive values, it's recommended you create secrets and set the
envvalue using theValueFromoption by specifying thearnof the secret created.Set the following Environment Variables:
APPSMITH_ENCRYPTION_PASSWORD: Encryption password to encrypt all credentials in the database. You can use any random string (Eg. test). The more random, the better.APPSMITH_ENCRYPTION_SALT: Use encryption salt to encrypt all credentials in the database. You can use any random string (Eg. test). The more random, the better.APPSMITH_SUPERVISOR_PASSWORD: Password to access the supervisor console to monitor the processes in the Appsmith container.APPSMITH_MONGODB_URI: Enter the URI of the external MongoDB v5 instance by adding a new env key.APPSMITH_ENABLE_EMBEDDED_DBto0. This disables embedded mock databases which is not supported on EFS volume.
Configure the health check to the following settings:
- Command:
CMD-SHELL, curl http://localhost/api/v1/health - Interval: 10 seconds
- Timeout : 5 seconds
- Start periods: 160 seconds
- Retries: 3

- Command:
Enable auto-configure CloudWatch Logs for log configuration.
Hit Add.
Finally, hit the Create button.
Create and run an ECS service
- Navigate to the clusters dashboard and click the ECS cluster created in Step 1.
- On the cluster details, under the Services tab hit the create button.
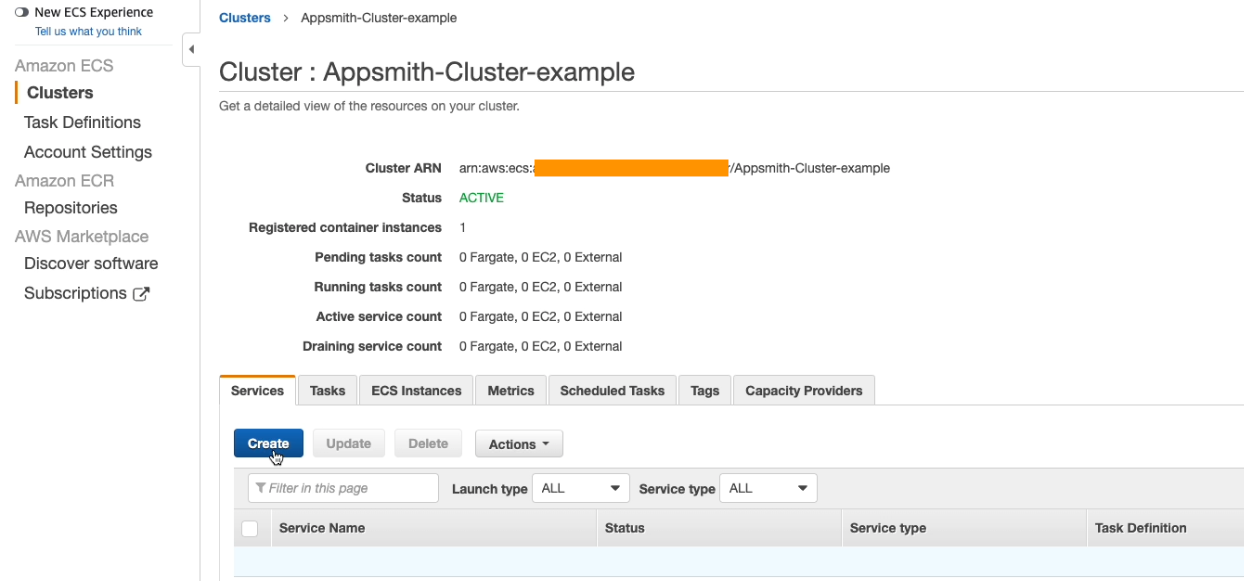
Configure the Service:
- Select Fargate as Launch Type.
- Select the Task Definition created in Step 2 with the latest revision.
- Select the Cluster created in Step 1.
- Enter the service name.
- Select the Replica Service type and the Number of Tasks to 1.
- Leave the remaining fields and sections with the default values, and proceed to the next step.
Configure the network:
- Select the VPC and the subnets.
- Update the security group to add the security group created in the prerequisite step, along with the security group with NFS access.
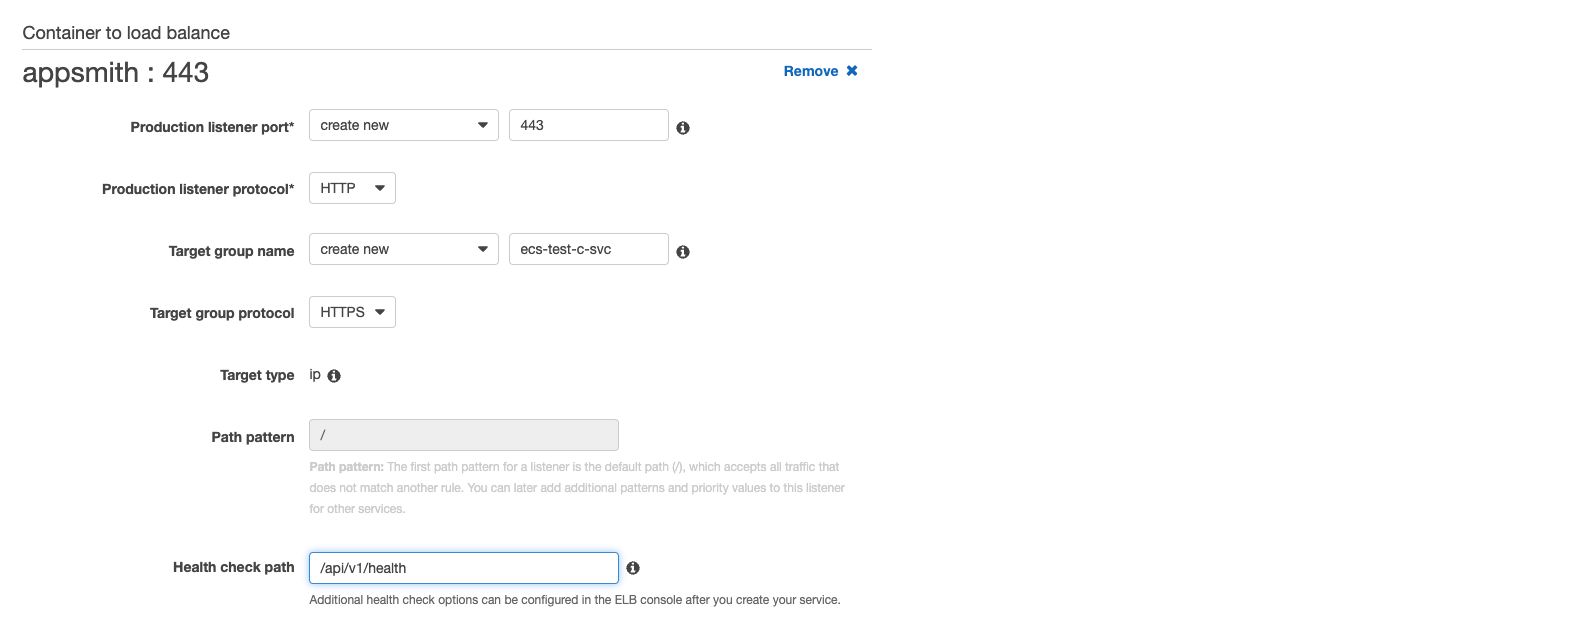
- Load Balancing:
- Select Application Load Balancer.
- Select the ALB created in the prerequisite step.
- Set the Listener for port 80 and click Add to the load balancer.
- Create a new Production listener port for port 80.
- Set the Production listener protocol to HTTP.
- Set a Target Group to create new.
- Set the Health Check pattern to
/api/v1/healthand evaluation order to 1. - Repeat the same steps to add a Listener for port 443 but with HTTPS protocol.
Set Auto Scaling - Proceed to the next step with the default configuration.
Review the Service configurations and hit the Create Service button.
The following screen is shown with the launch status, click the View Service button.
You are directed to the service detail page. Your task is listed under the Tasks tab on the cluster. Refresh the table until the status is RUNNING.
Obtain the DNS of your ALB and hit it with your browser to access the Appsmith instance.
Run commands on the Fargate instance
- Enable ECS
execon the Fargate instance with:
aws ecs update-service --cluster <Cluster Name> --service <Service Name> --region <Region> --enable-execute-command --force-new-deployment
Wait until a new deployment is rolled out, and the instance has exec enabled on it.
- Exec into the Fargate Appsmith instance with:
aws ecs execute-command <Cluster Name>
    --task <Task ID>\
    --container appsmith \
    --interactive \
    --command "bash"
- Once you have access to the bash shell, you can execute all commands that are available in the Appsmith container, like appsmithctl.
Troubleshooting
If you encounter any errors during this process, check out the debugging deployment errors. If you are still facing an issue, please reach out to support@appsmith.com or join the Discord Server to speak to the Appsmith team directly.
