Google OAuth
Appsmith provides a way to integrate with Google OAuth 2.0, enabling end users to sign in to the Appsmith account using their Google authentication credentials.
Prerequisites
- A self-hosted Appsmith instance. See the installation guides for installing Appsmith.
- A Google Workspace account.
Configure Google API console
To enable Google Sign-in, go to the Google API console to get the authorization credentials that identify Appsmith to Google's OAuth 2.0 server. Create a new project and follow the steps below:
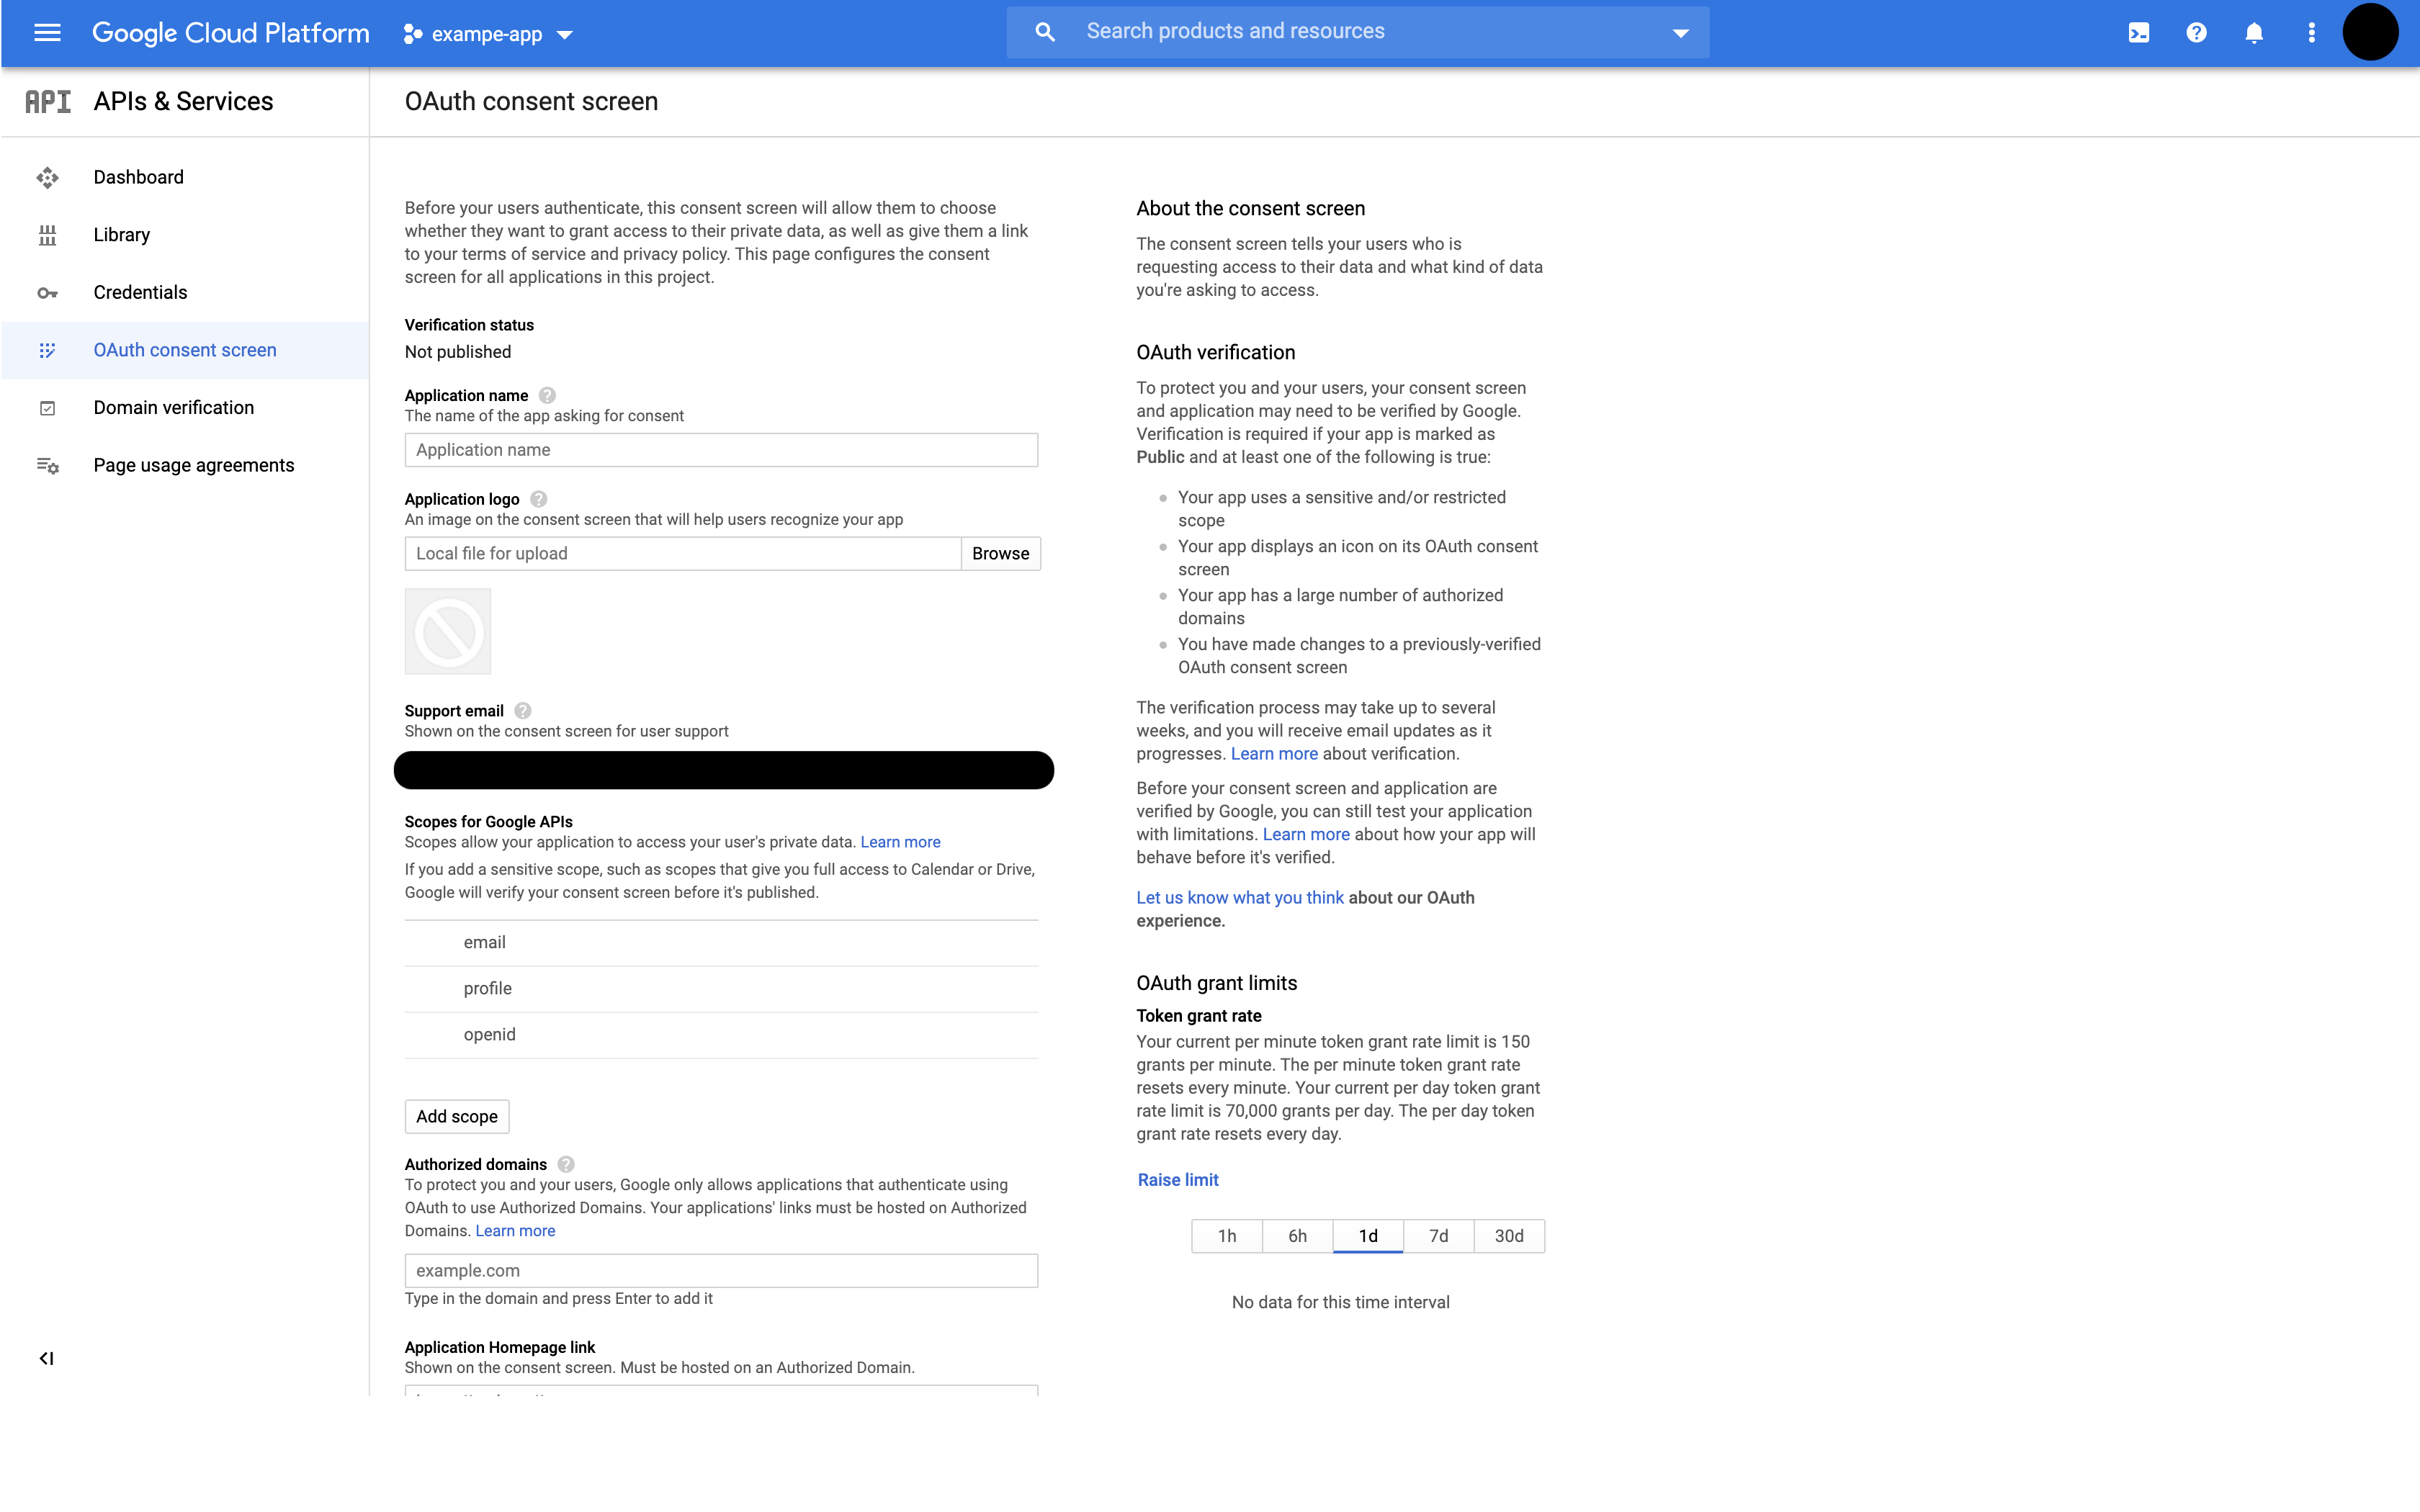
Navigate to the OAuth consent screen under APIs & Services. Choose how you want to configure and register your app, including your target users and click Create.

Configure the OAuth consent screen with information about the app and the Authorized domains where you are hosting Appsmith.

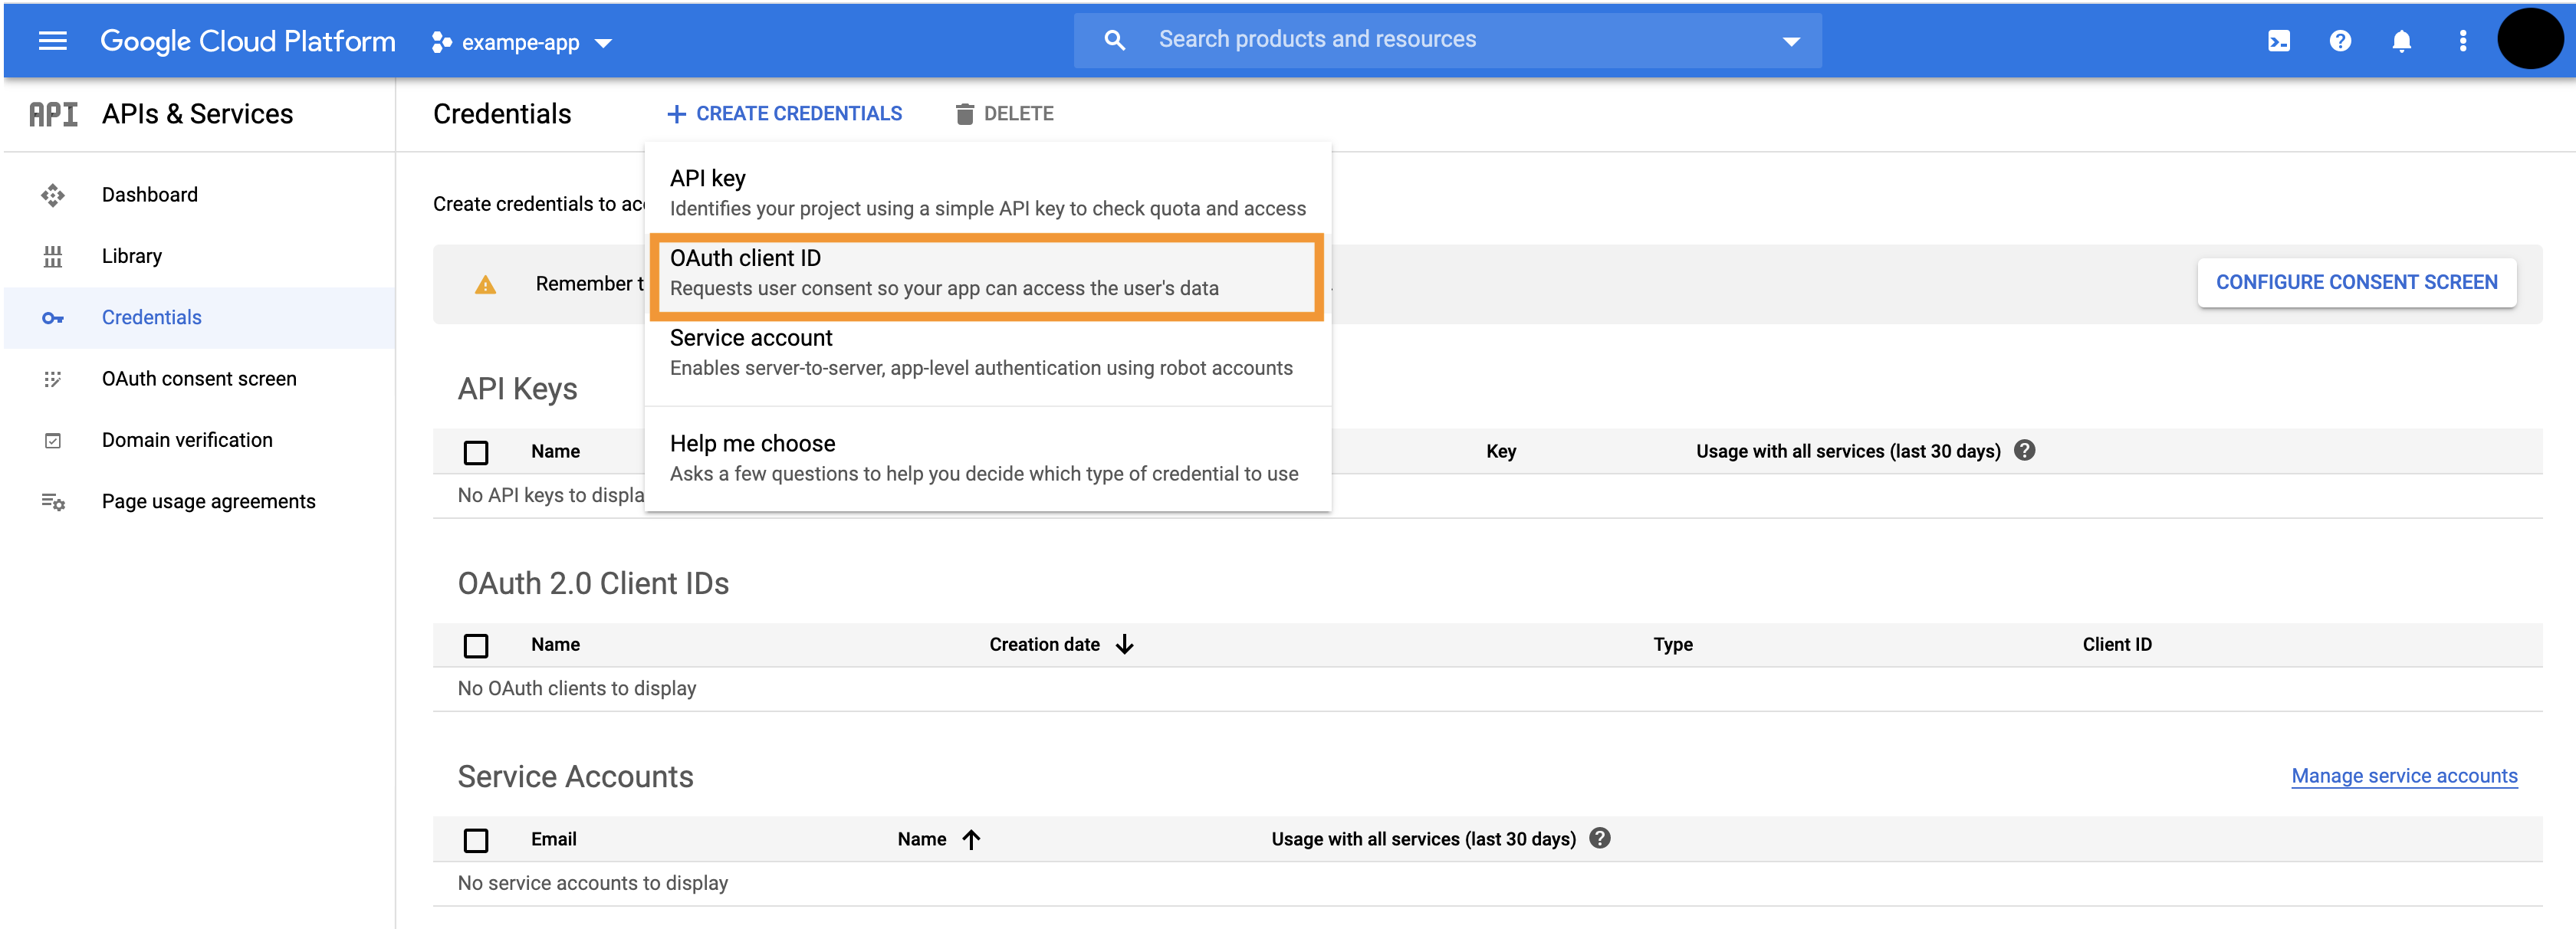
Navigate to the Credentials screen and click Create Credentials, select OAuth client ID from the options to create OAuth credentials.

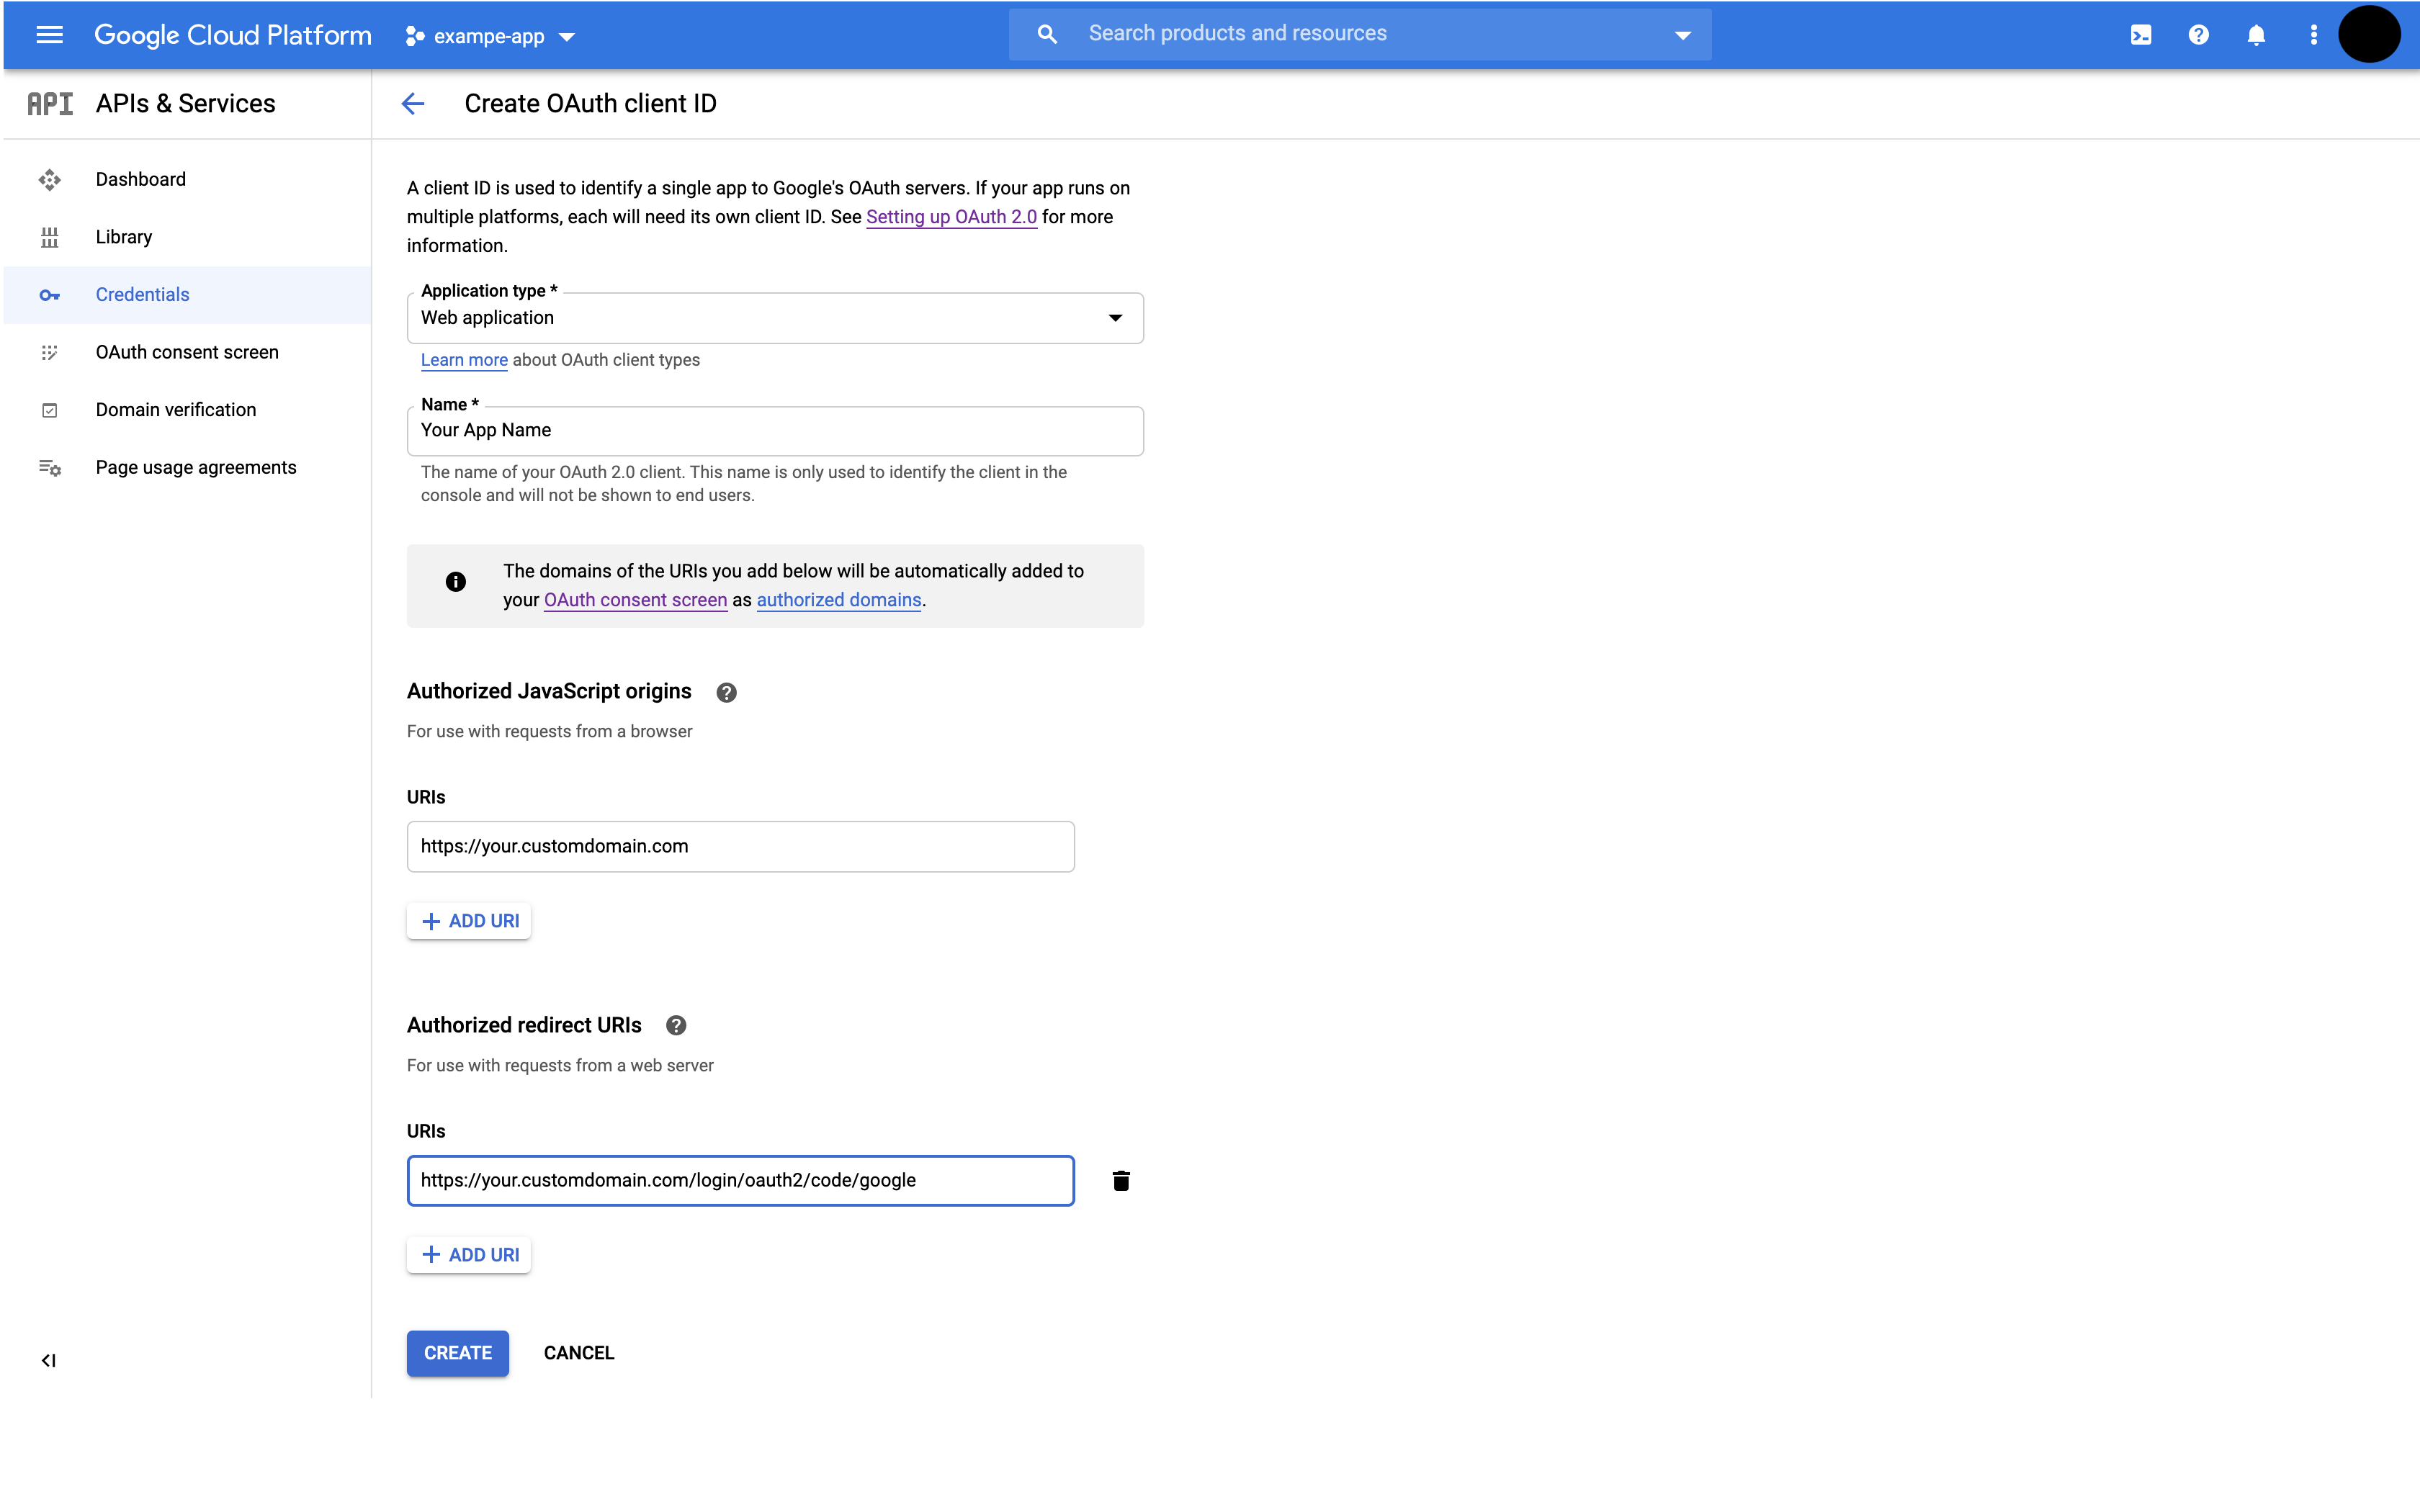
Select Web application under the Application type dropdown list. Update the following fields:
- Authorized JavaScript origins - The HTTP origins that host your web application. (Eg:
https://app.appsmith.com) - Authorized redirect URIs - Append the path that users should be redirected to after they have authenticated with Google (Eg:
https://app.appsmith.com/login/oauth2/code/google)
- Authorized JavaScript origins - The HTTP origins that host your web application. (Eg:
Click Create. You can get the Client ID and Client secret under OAuth 2.0 Client IDs in the Credentials screen.

Configure Appsmith instance
Test the Client ID and Client Secret before disabling Form login on Appsmith. This ensures that users can access Appsmith with their Google credentials. To fix an invalid Google configuration, update the environment variables.
There are two ways to configure the self-hosted Appsmith instance -
- Admin Settings
- Environment Variables
Admin settings
You can add the Client ID, Client Secret and allowed domains from Admin Settings. Go to Admin Settings> Authentication> Google, fill the required fields and click the Save & Restart button at the bottom of the page.

If you have set values using environment variables for your instance, those values take precedence over values specified in the Admin Settings UI.
Environment variables
Update the values for the following keys in the instance configuration file, for example, in the docker.env file for Docker installation (<PROJECT_ROOT>/stacks/configuration/) and in the values.yaml file for Kubernetes:
- Configure the
APPSMITH_OAUTH2_GOOGLE_CLIENT_IDandAPPSMITH_OAUTH2_GOOGLE_CLIENT_SECRETfields with the client ID and client secret generated in the preceding step. - Configure
APPSMITH_SIGNUP_ALLOWED_DOMAINSwith a second-level domain name (Eg:abc.com), to only allow users with an email address from that domain name to log in (Eg:john@abc.com). You can provide several domain names using a comma-separated list. - Restart the Appsmith instance.
# Example configuration in docker.env file
# ******** Google OAuth ********
APPSMITH_OAUTH2_GOOGLE_CLIENT_ID=YOUR_CLIENT_ID
APPSMITH_OAUTH2_GOOGLE_CLIENT_SECRET=YOUR_CLIENT_SECRET
APPSMITH_SIGNUP_ALLOWED_DOMAINS=exampledomain.com
# ******************************
After these steps, Google Login should be enabled for your Appsmith installation.
After these steps, your Appsmith installation should now enable Google Login. If you are running appsmith behind an ELB / Proxy, please update the Nginx configuration.
